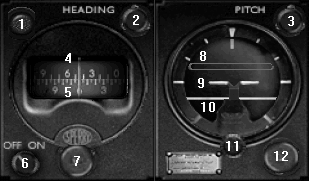
The "Sperry Gyropilot for Aeroplanes" was a remarkable invention. It was
superior to other designs since there was no direct mechanical linkage to
the gyroscope, thus preventing the possibility of the sensitive gyro element
being disturbed.
There is a natural tendency for a pilot to distrust any mechanical device
which its designers claim will do a job that formerly depended on his own
skill and experience. It is almost an aggravation to find one's aeroplane is
being flown as accurately under automatic control as when it is receiving
all the concentrated attention on the part of a human pilot to maintain
course and altitude.
In time, airline pilots overcame these prejudices, if not quite ready to
admit that the "Gyropilot" might even fly the aeroplane more accurately than
they.
The Sperry Autopilot is a fun instrument to fly. It requires much more
attention than the more modern autopilots, but all of this adds enjoyment to
flying the DC-3. Once you have gone through the explanations below, you'll
enjoyably engage the Sperry for many of your flights.
You will find that the Sperry Autopilot is very easy to understand, and a
very straight-forward instrument, once you have read these operation
procedures,. It's a lot of fun piloting an aircraft with the Sperry engaged
because you are actively in control at all times. You won't be dozing at the
controls at all.
 The
real Sperry Autopilot, and those modelled by third-parties in versions
earlier than FS2004, maintained heading by rudder control, not by aileron
control. For reasons known only to Microsoft they have inaccurately modelled
the FS2004 Sperry to perform like a modern Autopilot for heading control.
That is a disappointment, but we’re stuck with it.
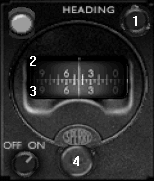
The operation of the Heading Control unit is very simple. Control #1 in the
upper right corner adjusts the autopilot heading hold. You may set the
autopilot heading either by left-clicking on knob #1 or by moving the
heading bug on your Directional Gyro, if one exists on your panel.
As you adjust knob #1 to change the AP heading hold, the upper scale in the
AP window, #2, will rotate to indicate the selected heading.
The lower scale portion of the heading indicator (4) is a directional gyro
similar to the primary directional gyro on the aircraft panel.
In the real Sperry, with the AP disengaged, the pilot manually turned the
aircraft to the desired heading, then rotated the heading knob, #1, so that
scales 2 and 3 in the window were exactly aligned, then engaged the
autopilot. The real Sperry maintained a heading, did not turn an aircraft
top a heading.
With the FS2004 Sperry one can select the desired heading with knob 1 and
the aircraft will bank and turn to the desired heading.
Each mouse-click of the heading knob, plus or minus, will change the
selected heading by one degree. That is the procedure, for example, to keep
the localizer needle centered while flying the ILS.
 Happily,
the FSX Sperry Pitch Control nicely models the real Sperry Autopilot in
performance. Controlling aircraft pitch with the Sperry autopilot is easy.
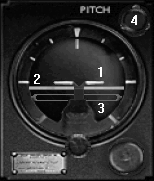
“Rotate” the “Pitch” knob, #4, by clicking on it. The plus sign that appears
when the mouse is on the knob indicates a positive climb, while the negative
sign indicates reducing the climb or an actual descent.
Adjusting the Sperry for a climb moves the AP Attitude Reference window, #3,
in a downward direction. The horizon bar, #2, will move down into the
reference window. This increases the distance between the aircraft wings,
#1, and the horizon indicating a climb.
Here are three examples of the Sperry AP Pitch unit for various flight situations.
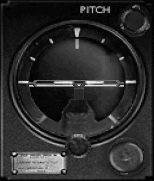
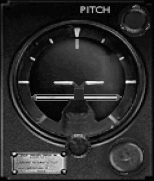
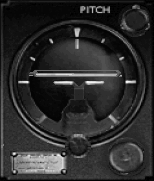
1) Using the Sperry when climbing … Adjust power settings for climb
configuration, 36 in MP and 2350 RPM. Adjust the Sperry pitch control to set
the airspeed at 105 kts, the Best Rate of Climb airspeed.
2) Using the Sperry when descending from cruise altitude … Adjust the power
settings for descent configuration, about 18 in MP and 2050 RPM. Adjust the
Sperry pitch control for desired descent speed, usually about cruise speed,
then adjust power to maintain 500 fpm descent.